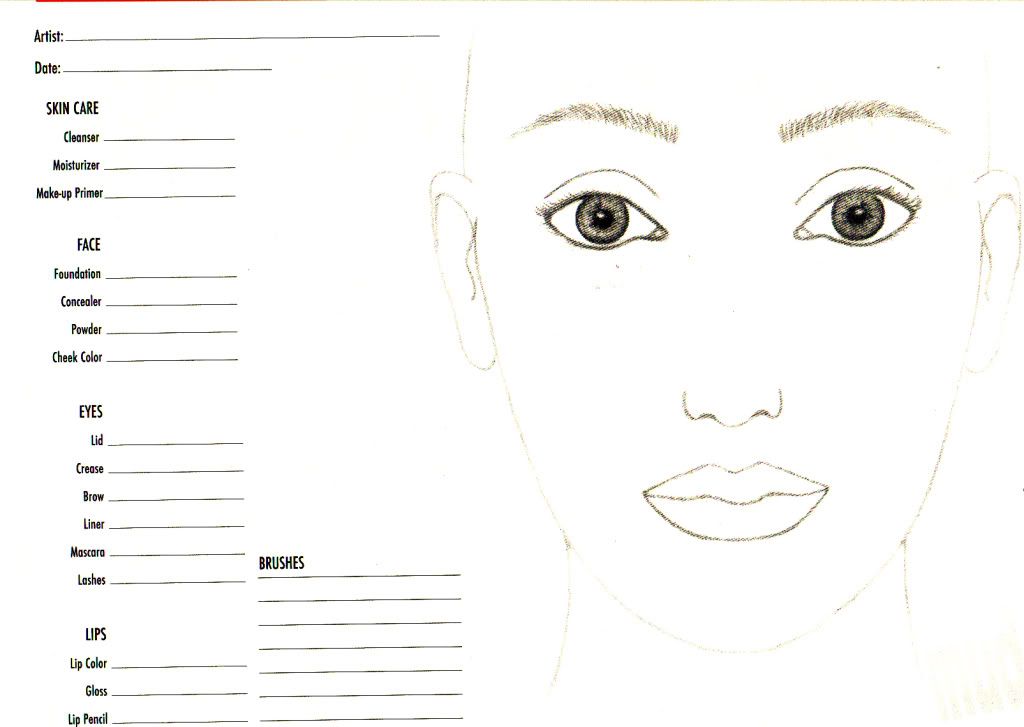
The BF and I are leaving for vegas to get married! Well not really (lol), but my co-worker is getting married tomorrow so we are heading over there. I haven't had time to answer all your questions and emails so I will try and get to them as soon as I can. In the meantime, I leave you all with face charts (both from MAC and Makeup Designory) to keep you kiddies occupied! You can print them out and have fun creating different looks or practice techniques such as blending. The best paper to try these on of course is paper similar to that of the sketch or watercolor paper, or pretty much any paper that has a soft, felt feel so it's easier to blend on, but regular white printer paper is also sufficient. Enjoy!
(Click for larger size)
Friday, October 24, 2008
Leaving for Vegas! And of course Face Charts!
Labels: Face Charts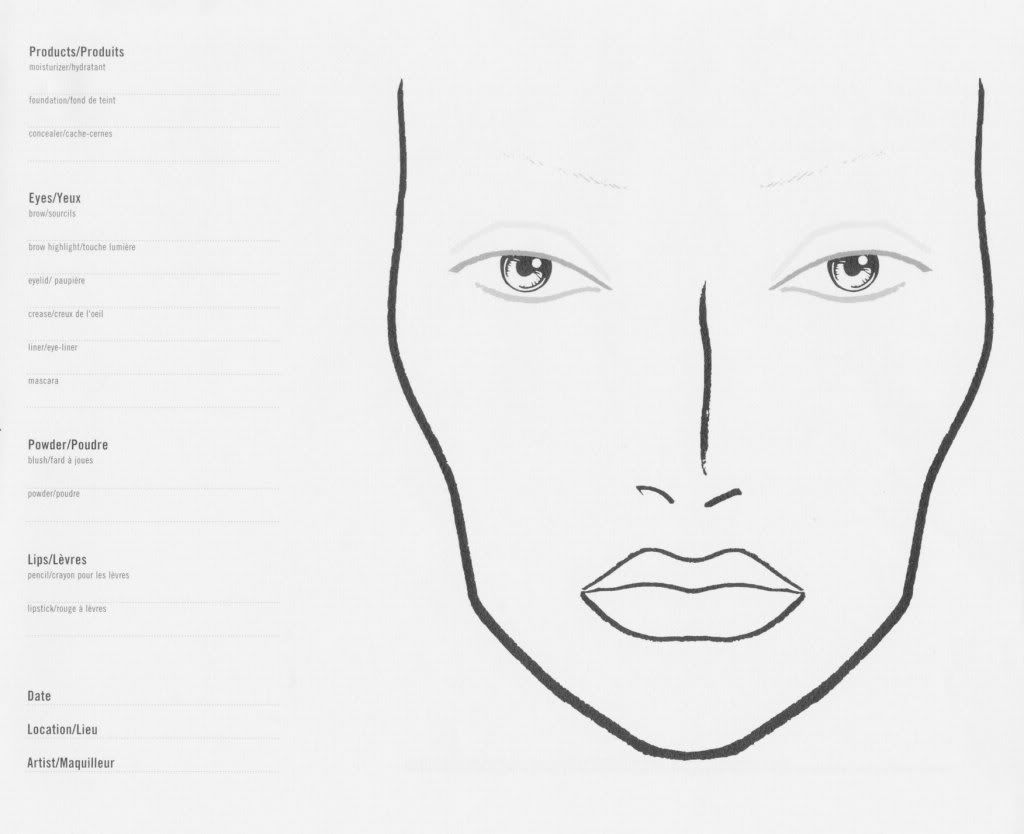


Thursday, October 23, 2008
Halloween Look: Hollywood Glam/Pinup Girl [a bit pic heavy!]
Labels: INSPIRED LOOKS, LOOKS: BOLD RED LIPS
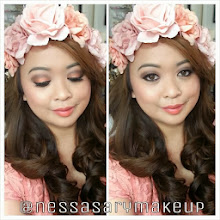
This was actually requested by my bestie Erica, and a few other gals as a Halloween look (sorry it's a bit pic heavy, it's also my main profile pic). It actually came out better than I envisioned it granted i've never played with this "era" before. I also used the MUFE HD foundation for this look. Isn't it flawless??! It just gives an awesome look! I got the flower from an accessory store (I think it was "Amuse"). The steps I used are a bit similar to the Matryoshka FOTD in the sense that I used a neutral base and falsies, but I skipped out on the thick eyeliner and falsies at the bottom for a more classic, vintage look. Since I have a beauty mark by default I didn't need to create one haha. I also used "Stark Naked" blush and "Petticoat" MSF on my cheeks.
My inspiration was actually Dita Von Teese & the model from "Red She Said". Long black arm gloves would compliment this look and make a great costume. I also did a quick video below on how I did my hair for this FOTD.
Also, someone asked me about the size of the Urban Decay 24/7 travel kit, in comparison to the original, it's actually over half the size of the original, so you get all the colors at a good price! (I'll take a pic soon).
Directions:
- Primed face with Monistat Chafing Gel, then applied MUFE's HD Liquid Foundation in #127 with Beauty Blender Sponge.
- Apply your concealer
- Apply your eye primer, I used MAC PP in "Soft Ochre".
- Sweep your lids with a neutral eyeshadow, such as patina. I mixed mine with: Patina, Soba, and Ricepaper.
- Highlighted using: Shroom or Ricepaper, Femme-Fi is good too.
- Apply eyeliner (I used Revlon Colorstay Liquid Eyeliner in Black) starting from the middle of the lid, and wing outward. Then you can fill the inner with eyeliner. I applied 3 dots at the end of the 'wing', but this is optional.
- Apply thick falsies for an elegant look that stands out. I used NYX's False Eyelashes in 101 (they are the ones that have a criss-cross pattern).
- Lined my lower lashline with Urban Decay's 24/7 Pencil in "Zero", then smudged it with a Q-tip for a smokey look.
- For the cheeks I used MAC brush #109 and applied "Stark Naked" Beauty Powder Blush on the apples of my cheeks and swept up towards me ear, then applied MAC MSF in "Petticoat" on top.
- Contoured with "Emote" blush.
- Used MAC lipstick in "Port Red" on lips, with MAC "Fanplastico" lip laquer on top for shine.
Don't mind my Tyra banks five head, LMAO!
What I used:
[Face]:
- Monistat Primer
- MAC Studio Finish Concealer NC35
- MUFE HD Foundation
- MAC "Emote" blush to contour
[Cheeks]:
- MAC "Stark Naked" Blush
- MAC MSF in "Petticoat"
[Eyebrows]:
- Anastasia Brow Whiz pencil in "brunette"
- Anastasia Brow Filler
[Eyes]:
- MAC Paint Pot in "Soft Ochre" all over the lid
- MAC e/s in "Patina", "Soba" & "Ricepaper" all over lid
- MAC "Shroom" as highlight
- Revlon Liquid Eyeliner in "Black"
- NYX False Eyelashes #101
- Urban Decay 24/7 Pencil in "Zero" on lower lashline
[Lips]:
- Too Faced Borderline Anti-Feathering Pencil
- MAC lipstick in "Port Red"
- MAC Lip Laquer in "Fanplastico"
CLOSE UP OF THE MAKEUP:
Daytime (NO FLASH):
Corset worn (from when I used to work at Forever 21 like 5 years ago! LOL):
Quick video on how I did my hair:


Wednesday, October 22, 2008
Product Review: Ly-Na Pearl Cream
Labels: Face, Product Reviews
Packaging: 3 out of 5
Quality: 5 out of 5
Price: $3-$4, Seafood City Asian Market, or small Asian stores or markets, also available online and on eBay: Veryasia.com, eBay, HerbsDirect
Would I buy again? YES! I buy these by the case load, LOL.
What it does: Removes blackheads, pimples, ephelis and wrinkles.
Direction: Cleanse your face, apply the cream and massage for 2 to 3 minutes, once in the morning and at night. (I personally spritz a little water so it goes on better, MAC Fix+ spray is great too)
Active ingredients: Stearic Acid, Centanol, Lanolin, Glyceryl Monostearate, Isopropyl Myristate, Sulfur, Perfume, Ion Exchange Water, Glycerine, Potassium Hydroxide, Pearl Powder.
Yes, yes, I know that everyone and their momma has raved and blogged about Ly-Na Pearl Cream, but this seriously is a holy grail. I don't use it as much as my sister does but she swears by it and so do I.
I use it when I have a few pimples that I want to zap, but I try to use it every other night, or at least 3 times a week to maintain that "glow". It's basically a medicated paste, and I actually remember my grandma using it all the time when I was younger and I see why! This stuff works miracles!
As a beauty blogger, essentially my curiosity leads me to try different things on my face (skincare, foundations, moisturizers, etc) so my skin can take a beating at times, and doesn't react all that great to certain things...and when I apply the Ly-Na Pearl Cream at night for a few days, my skin dramatically clears up and is back to normal.
PROS:
- Cheap! Only $3 a jar!
- It really worked for my sister, minimized her scars and pimples, and it calms my skin down when it gets crazy, as well as giving a nice glow!
- I like the smell of it
- I like how it's a night-type of a treatment, makes me feel like it has a longer time to "do it's thing", and then I just rinse off in the morning!
CONS:
- The jar packing itself is pretty cheap, it's also very shallow so you don't get as much product in comparison to the size of the jar- but hey it's $3


Product Review: MUFE HD Invisible Cover Foundation
Labels: Foundations and Powders, Product Reviews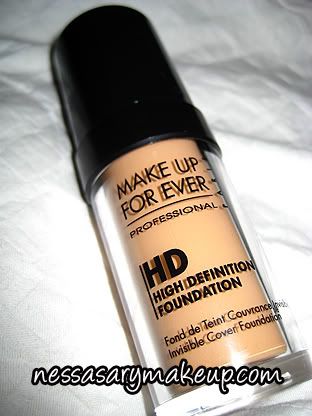
Packaging: 5 out of 5
Quality: 4 out of 5
Overall: 4 out of 5
Price: $40, Sephora
Shade Purchased: #127 (Dark Sand)
Would I buy again? Yes!
***My next post WILL show the MUFE foundation as that is what I am using!***
What it is:
An oil-free medium-to-full-coverage liquid foundation that covers skin imperfections flawlessly while remaining invisible on-screen and in real life.
What it does:
Creates a soft-focus effect, designed to meet the coverage concerns of those in the spotlight. It creates a complexion that looks flawless, even in bright or harsh lighting.
What else you need to know:
This Sephora-exclusive foundation comes in 25 different shades to suit all skintones
-Relipidium: Moisturizes the skin (+46% after 4h).
-Fucogel: Forms a microfilm that prevents dehydration and protects against external aggression.
-Sericite: Enables rays of light to spread more widely, intensifying the radiance of the complexion.
Ingredients:
Aqua, Cyclopentasiloxane, Neopentyl Glycol Diethylhexanoate, Mica, talc, PEG-10 Dimenthicone, Biosaccharide Gum-1, Phenyl, Trimethicone, Sodium Chloride, Lauroyl Lysine, Dimenthicone Crosspolymer, Glyceryl Caprylate, Methylpropanediol, Butylene Glycol, Phenoxyethanol, Chlorphenesin, Disteardimonium Hectorite, Sodium Myristoyl Glutamate, Cyclohexacyloxane, Methylisothiazolinone, Sorbitan Sesquileate, Silver Oxide, Propylene, Carbonate, Parfum (fragrance), Methylparaben, Fagus Sylvatica Extract (Fagus Sylvatica Bud Extract), Hydrolyzed Yeast Protein, [+/- CI 77891 )titanium Dioxide), CI 77491 (Iron Oxides), CI 77499 (Iron Oxides).
Prelude: I had to give this foundation a spin since I am always on the lookout for a flawless foundation. (I also love MUFE's HD Powder!) It had so many great reviews and I love MUFE by default, so I definitely had to test this out even though I hate liquid foundations because they tend to break me out, but I don't need too much coverage to begin with so mineral foundations are still my weapon of choice. :)
PROS:
- Goes on nicely, easy to blend. Does give a nice flawless finish, almost like an airbrushed look, no shine. Definitely great for photoshoots!
- They give you a lot of product, and a little goes a long way so you don't need a lot to cover your entire face. Just a couple dots and blend with either a sponge or a foundation brush and that's it!
- The bottle is cute and it's easy to travel with
- No weird funky obvious smell
- Lasts a long time (at least for me but I have dry skin)
- Can be used by itself or under mineral foundation for a more airbrushed look or to set. Or you can use MUFE HD Powder (the white one) over this to set.
- Finally a liquid foundation that matches me perfectly!
CONS:
- May be a bit pricey for some of you, but it lasts a long time, I've been using mine for about 3 months now and it still looks like I haven't touched it!
- I started to break out a bit but I cannot pinpoint whether this foundation was the cause of it or it was in addition to something else (such as a new skin regimen or primer, etc), I have used it by itself and as well as along with my mineral foundation OVER it recently, and have not broken out, so it may just have been something else
Overall? This is a pretty remarkable foundation. It's easy to see why many industry professionals use MUFE, especially TV news anchors and the like. It doesn't give a "whitish cast" on camera and really blends well with your skin for a natural and flawless finish. It's like you are not even wearing any makeup! I also like how there are a TON of shades to choose from and you most likely will find one that matches you. The price is a bit steep considering I pay less than half of that for my mineral foundation, BUT it lasts you a really long time and the results make it worth it!

Madame Madeline Falsies Haul & Reader Questions
Labels: Hot Deals and Promo CodesThanks for all your comments on my last post! It's always interesting to see people's roots, their background; what helps shape them. Introducing the most important people in my life- makes me more human! LOL. They come first above all, and as you get older, you realize how much you need them, and how much they need you. Absence makes the heart grow fonder. :)
Here are just a few reader questions:
Q: I love your white dress! Where did you get it from?
A: Thanks! It barely fits now because I gained weight, lol, but I got it from Forever21 about two years ago, and the seashell silver belt is from H&M.
Q: Are you and your sisters wearing matching dresses?
A: That picture of my entire family was from my parents' 25th Silver Wedding (they renewed their vows), so mom wore silver, and Me and Lauren are matching although her dress is slightly different we have the same belts.
Q: Your mom looks young! She looks like your sister!
A: HAHA, let's just say she IS young, LOL. She had me young, but she's probably reading this- all flattered, LOL.
Anyway, here is my falsies's haul from MadameMadeleine.com, they have the widest selection of false eyelashes, from natural to outrageous, and they also sell adhesive glue. Use these PROMOCODES: 5LASHES for 5% OFF, MYSPACE for 8% OFF, and type in FREEBIE in the message box for a free pair of lashes.
It's superfast shipping too!
I also got the CUTEST contact lens case from Wal-Mart! I named him Franklin, LOL. I have a habit of naming inanimate objects. For instance, my GPS is named Mandy, LOL.


Tuesday, October 21, 2008
Ohana=My FamBam
***For those of you who asked where my sis got her homecoming dress, I called her to ask and the convo went like this:
Me: Hey Rory, I have a few readers that want to know where you got your dress from...
Sister: I got it from JCPenney
Me: Ok, thanks I will let 'em know
Sister: NO! Don't tell them!
Me: Why?
Sister: Because then everyone is gonna have the same dress as me...
Me: You are retarded
Sister: I know (then we both start laughing)
So she got it from JCPenney y'all!
Jessica asked me to post a pic of the rest of the clan. I found this tattered photo in one of my old wallets. Waaaaayyyy back in the day! This was our first real family portrait--pre-Megan days (before the youngest one was born) when it was just me and my bratty sister Lauren Ashley. Look how cute and TINY she WAS haha jk, she turned into a beauty, but she is STILL a brat. LOL. This family pic was taken I think when I was around 12 and Lauren was about 2 or 3- can't believe she was this tiny little toddler who used to follow me around and now she is turning 18! Geezus I feel old!
I laughed when I found this pic, my dad has so much hair! And my mom actually wore makeup! She doesn't wear any at all now, and dad is slowly losing his hair, LOL. My hair was natural, even though when I was a kid it was a medium brown, then turned jet black. I didn't wear any makeup and mom told me to put a little lipgloss for this pic so I wouldn't look dead and pale since I was white like Casper, and boy was I skinny! LOL.
Me, Lauren (yes the same girl in that red homecoming dress!), and mi madre
I got tanned since I was a cheerleader in elementary school, I don't even look like I am her kid haha. For some reason I immediately thought I looked liked Mady from "Jon & Kate plus 8" here, LOL. My sister LOVED Mickey as you can tell.
(Picture deleted)
Lauren Ashley is the middle child-the black sheep (and she knows it!) She is definitely her own person and loves music, she always has her iPod (even in this pic she has them on!) and she is VERY smart. Has been in gifted schools/classes since she could walk and has continuously maintained good grades. She is also the quietest one out of me and the youngest, she doesn't look the part, but she is VERY shy.
My other sister Megan Elsa, the baby of the family. She is also called my twin because she is exactly like me. We like the same things and hate the same things. When she is injured somewhere, I have the same injury on the same side- no joke. She is a bigger brat than my other sis, but she is very caring and energetic. She has such a big heart in such a tiny body. She can make you laugh till you can't breathe! She is just so hilarious and she is always happy. She is also very stylish and loves clothes, shoes, and accessories- just like me! She has a soft place in my heart, so unfortunately I contribute to her being a brat since I can never can say no to her!
The tres marias:
The Present:
So yup that's my awesome family, and I love them dearly. We are all very close and we talk everyday even though I am now MILES away from them. My mommy and my sister read this blog and my whole family has been SO SUPPORTIVE in everything I do...my mom even has some of my old pics from my modeling portfolio hanging in her house and she's always calling me asking me about the products I write on my blog, LOL. I swear they keep me going...they truly helped me become a better person.


Monday, October 20, 2008
Halloween Look & Tutorial: I'm a Leopard!
Labels: INSPIRED LOOKS, Tutorials
I was bored and wanted to get out of my comfort zone, so I decided to play with my Mehron palettes, to create a simple leopard look you ladies you can do for Halloween. I did it superfast so of course you can cater it to your liking, make it neater, etc. Especially since some costumes cost an arm and a leg nowadays, or if you really don't feel like dressing up, you can quickly whip this up...AND it's totally work safe! LOL. You can also customize it to your preference(make it sexier or scarier), I just created the basis for the look so feel free to add your own accessories, outfit, etc. I was gonna make the nose bigger (using more black) and I forgot!
I will be doing more Halloween looks so stay tuned!
What I used:
- Mehron "Tropical" Palette
- Halloween White Face Paint
- Halloween Black Crayon
- Revlon Liquid Eyeliner
- Fangs (optional)
Directions:
- Mehron "Tropical" Palette: Mix of yellow and coral color to create the color of the face, dabbed it on with a sponge, let dry.
- Using white face paint (or similar), create the area around the eyes and mouth, let it dry.
- Using the Halloween black crayon, create the nose and mouth area.
- Using the black liquid eyeliner, create the "whiskers" and "spots".
- Apply eyeliner and mascara
- Using the brown color in the Mehron "Pastel" palette and a concealer brush, create the "leopard spots" on your face, then with black eyeliner create the border of the spot.
Apply black lipstick, eyeliner and, mascara...


Sunday, October 19, 2008
Urban Decay Haul
Labels: Urban Decay
I went to Sephora the other day and got a few Urban Decay items; I LOVE their 24/7 Eye Glide Eye Pencils ($29 for the travel kit, $16 for the full size), I got the travel kit so I can try all the colors, they seriously do not smudge, budge, and they are waterproof! So you ladies who complain about the waterline/lowerlashline smudging throughout the day, definitely get a UD eyeliner! It makes such a huge difference. I'd have to say it's the BEST eyeliner out there in terms of the way it goes on, and how long lasting it is- which is perfect for the lower lashline.
I also saw their Bamboo- all natural palette(Sustainable Shadow Palette, $36), "Flash" and "Flipside" are so pretty, but I don't like how 3 or 4 of the eyeshadows are CHUNKY GLITTER. And I mean chunky!
From the "VELVET ROPE" kit:
From the "VIP" kit:
I got the full-sized pencil in "Rockstar", it's a gorgeous deep purple:
WITH FLASH:
NO FLASH:


Subscribe to:
Posts (Atom)


 Posts
Posts