
I think the most show stopping part of the face is the eyes. It's what everyone looks at. When you have great shading and "eye-catching" eyeshadows (get it? haha), the more people have a tendency to look at your eyes. When I go out and someone compliments me on my eye makeup they want to know 2 things: What colors do I have on? And how did I do it?
Like I mentioned before, I MIX ALL my eyeshadows, not because you have to, that's just how I am. I love all sorts of colors and I love experimenting with the mixing of colors to achieve one really awesome color that just 'pops' on my lids. The trick is to really know how to blend and shade correctly and evenly. Trust me, it's not that easy.
And believe me, you DO NOT have to spend a lot on make-up to get the look you want. I know there are girls out there who live on MAC Cosmetics, and that's fine (because I love MAC myself), but $14.50/eyeshadow can be a bit steep for some. You can find (or make) similar colors to that of MAC at your local drugstore. I love NYX Cosmetics because they have tons of colors and their eyeshadows are only $2.99 a pop, so you can get a lot if you have $20; and that's how much ONE MAC eyeshadow is including tax and they work just the same!
I do what I call, an eyeshadow test, I place layers of different colors on my hand and BLEND them together to see how they compliment one another. Of course it's different on your hand than your eye, but you wanna see how they look overall blended.
Here are simple steps to applying eyeshadow:
1. It is very important to use an eye primer, or eyeshadow base because that holds your eyeshadow in place and prevents creasing. (see below, Laura Geller's Spackle Trio)
2. Use an overall highlighting eyeshadow to widen and brighten up the eye (try Revlon's Colorstay eyeshadow in "White Whisper", $6), apply this ALL over the lid all the way up to the brow bone.
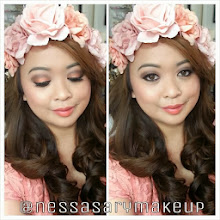
3. Then apply the LIGHTEST color of eyeshadow on the inner corner of your eye. What I mean by lightest color, is when you are trying to achieve the "gradient effect" (see picture above), if you look closely, I actually have 3 different colors. You want, light, medium, and dark shades (in that order) on your lid.
4. Apple the MEDIUM shade from almost your inner corner of you eye, all the way to the end of the lid.
5. Take your darkest shade using an ANGLED eyeshadow brush and BLEND that shade with the medium until it looks almost one color from the outer to the inner part of the lid, but can still see the medium and dark shade separately.
For the pic above, I used Revlon's "White Whisper" as my highlighting base, Flirt Cosmetics "Limelight" as inner corner and medium shade, and an unknown brand black sparkly eyeshadow as my dark shade and blended it together. And voila!
I really like these 2 eyeshadows, they are both Sephora brand, I don't know the names of the colors, but it's a gold shimmer, sparkly color, the one that is open, is a CREAMY eyeshadow which I recommend to wear UNDER another eyeshadow if you plan on wearing eyeliner because it's super hard to put eyeliner on a cream eyeshadow as it is just gliding everywhere. (Sephora, $10)

Another thing I love, is this cream eyeliner palette from Sephora ($15), it's a 4-in-1, and has 4 different eyeliner colors to match a majority of outfits. Has silver, black, goldish-brown, and army green. It's also perfect for your purse or traveling.
Once you are done with eyeshadows and eyeliner, the next step is MASCARA. I love L'oreal's Telescopic Mascara ($6-9), it lengthens your eyelashes a lot so it looks like you ARE wearing fake eyelashes, or Sonia Kushuk's "Lashify Waterproof Mascara" ($7.99, see below), it even comes with a handy eyelash comb! To "lengthen" your eyelashes, first comb out all your eyelashes (I like Sonia Kushuk's eyelash comb/eyebrow comb combo), and then use a CLEAR mascara (gel-like almost), this is a great primer for eyelashes and helps your mascara glide on easily avoiding the annoying CLUMPS. Apply a couple coats of your mascara, and then from the very TOP of the eyelashes only, apply several coats, making your eyelashes look "longer".

And what completes the whole eye than a pair of false eyelashes to really widen your eye and get everyone talking about how beautiful your eyes are!
As you can see, I got these from Sally's Beauty Supply ($4 a pop). It's best to get them here because they have quite a selection from normal lashes, to runway, to high fashion, what ever look you are going for, you can find it at Sally's. Target and other drugstores have a very LIMITED selection of eyelashes simply because that's not a specialty store and only carry certain items.
Get the "invisibands" eyelashes because they have invisible bands so it looks flawless as if you are not wearing any fake eyelashes. Be sure that once you have applied your lashes, that you put black eyeliner along the band to finish the look!
If you are new to putting on eyelashes, try Sonia Kushuk's "Leading Lady Eye Set", $12.99 at Target.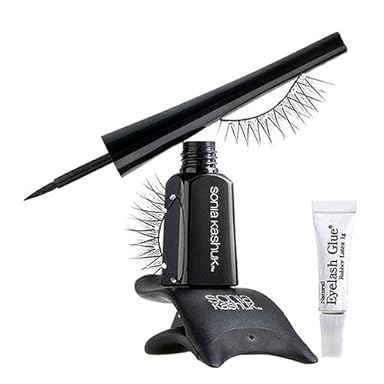
Saturday, May 19, 2007
"Your eyes are the windows to your soul..."
.
Subscribe to:
Post Comments (Atom)


1 comment
okay girl... i just got the telescopic mascara. i ALWAYS use VOLUMINOUS... but i trust yah! i'll let you know how i like it :) :) :)
Post a Comment
Thanks for stopping by my blog!