
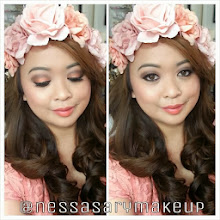
Below is my 2nd video tutorial, I know I have been lagging on them, but it's been hard since the file size is huge, I finally figured out how to use my iSight camera on my Macbook and the time lapse feature on it, so please FORGIVE this video as this was my first attempt with time lapse and so I only did ONE eye and not BOTH :(
At least I know now, so next time will be a much better tutorial. THERE IS NO SOUND, so in the future I plan on adding text slides in there to illustrate EACH step as time lapse does not let me input sound.
P.S. Also, in case you are wondering, I tend to look down in the video because my mirror was there, as it was hard doing it in front of the camera since it's reversed, so next time i'll have it where you can see the face better.
So for now, here is the video, if you have any questions on a specific step, let me know!
Wednesday, August 1, 2007
Video Tutorial #2 (Smoky Eye Look-Time Lapse)
.
Subscribe to:
Post Comments (Atom)


2 comments
Hey there, I was wondering how you got into modeling. I was interested in maybe trying it out, and just wanted some tips or suggestions how I might start out. You do so great Vanessa! and I love how you enfasize the fact that you won't conform to a stereotype :D
Love,
Jamie
Hey Vanessa...I am looking forward to more tutorials from you. The one that was just posted was really hard to follow since it is just not viewer friendly. A picture tutorial would probably have been better. You said you have a mac book so I'm guessing you should also have iMovie HD? You can use that to create your tutorials. Once you open the program, and you indicate that you want to create a new project, the iSight camera is immediately started. Somewhere near the bottom, there is a little slider (one side has a camera and the other a scissor). Click or draw the button to the side with the camera and you can start filming. Once you are done, just pull it over to the scissor and you can start editing. Thats about all that I know about the program. Just play around with it and you'll get it. I hope that helps you out!
Post a Comment
Thanks for stopping by my blog!